A Guide to Connecting SSDs to an iPhone
Welcome to this short and simple guide to connecting an SSD to your iPhone. You’d think this would be a simple task, but there are a few quirks you need to be aware of.
In case you don’t already know, I also run a monthly newsletter where I share exclusive stories, experiences and insights relating to tech and my journey as a tech creator. If that sounds like your sort of thing, consider joining below (it's free!).
Why bother using external storage?
You could technically shoot all your videos on your phone and transfer everything to your laptop (e.g. via AirDrop/email/cloud/Image Capture).
But, if you’re working on multiple video projects at once with hours worth of ProRes footage, you’re going to be sat there for hours trying to transfer it across devices. And even then, your phone and laptop likely won’t have enough storage to hold all those files - you don’t want to have to delete precious footage just because you were short on storage!
- For context, my iPhone and MacBook both have 256GB of max storage. If I subtract the apps & files I already have, I probably only have 50GB leftover for storing videos - that’s clearly not enough, especially when I usually like to batch record 3-5 videos at once.
Using an external drive can be a great way to boost your storage. Here are just some advantages:
- If your phone or laptop dies, you can still access your videos.
- It’s much cheaper than upgrading the storage on your device. Apple usually charges around $200 for a typical storage upgrade - for the same amount of money, you could pick up an SSD with 2TB of storage!
- You can edit videos right off your drive, so none of the videos are ever transferred onto your laptop - this saves you time!
Hopefully by now you’re convinced that having an external drive is important. But which types of drive are best? Continue reading to find out…
Types of external storage
There are many types of external storage devices. Some are more portable and affordable than others. The most common types you’ll encounter are:
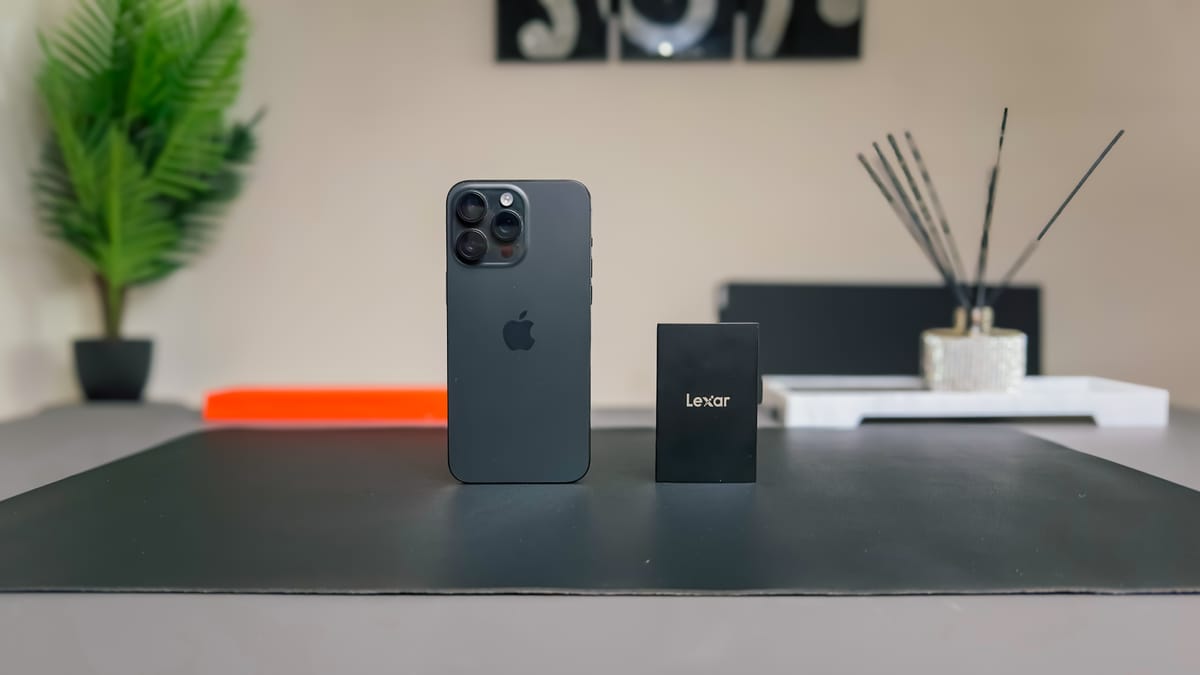
- SSDs - popular ones are the Samsung T7 Portable SSD and the Lexar Sl50 SSD (which is the one I use). The advantage of them is that they strike a good balance between portability (important if you’re carrying your iPhone whilst shooting) and having enough storage to be able to hold all your videos
- SD cards - these are slightly smaller, and hence easier to carry around. But they’re also easier to lose, and might not be able to hold as much storage as an SSD, or have the best speeds.
Connecting external storage to your iPhone
Most external drives come with a USB-C port, which you connect via a USB-C cable directly to your iPhone. Head into the Files app and check that your SSD appears under the ‘Locations’ header.
When it comes to shooting videos, the SSD should show up automatically on the default camera app. If you’re using the BlackMagic Camera app to record videos, you’ll need to head into Settings > Media > and manually select the external drive every time you use it.
Requirements
Power consumption - the external drive should not require more than 4.5W of power to work. If you don’t want to have to mess around with choosing the right SSD, just get the one I use - it’s the Lexar SL50 2TB SSD. It was built specifically to support the new iPhones
SSDs - like most other accessories - require a certain amount of power to work and transmit data. Unfortunately, the iPhone as of right now can’t output more than 4.5W of power to external peripherals, meaning if you try connecting something like a SanDisk SSD (which requires at about 8W of power to work), one of 3 things might happen
- The SSD just won’t show up in the Files app at all
- The SSD will show up, but when you press record after about 30 seconds the camera & files apps will crash and you’ll have to restart your iPhone
- The SSD will show up and the video you somehow managed to record your video, but when you go to play it back you encounter lots of dropped frames (basically parts of your video will be missing - I’ve been there!).
If you already have an SSD that requires more than 4.5W of power to work and you don’t want to spend money on a new one, you could try connecting connecting a powered USB hub - the way it works is you’d connect the hub to a wall outlet, your phone to the hub via USB-C, and then your external drive to the hub via USB-C. Just make sure the USB-C ports on the hub support USB 3.0 speeds or better. To be honest, you’ll still need to spend a bit of money on a good USB hub, which is why I think you’d be better of just getting a new SSD - but each to their own!
Transfer speeds - shouldn’t be an issue with most modern drives, but make sure it has a write speed of at least 220 MB/sRead speeds are how quickly your drive can access and open files (this is important for editing).Write speeds are how fast your drive can save something (this is important for recording) - to record videos to a drive on the iPhone, it must support write speeds of at least 220 MB/s. Most SSDs on the market usually exceed this - the Lexar SL500 I use has read speeds of 2000 MB/s and write speeds of 1800 MB/s!
Cables - get a USB-C cable that supports data transfer speeds of at least 4.8Gb/s (USB 3.0 speed). If you don’t want to have to mess around with choosing the right cable, just get the one I use - it’s the Anker Thunderbolt 4 cable which costs just £21.99. It might be overkill, but it means I never have to worry about choosing the right cable again.Okay I think this bit is important. The iPhone 15 Pros (and newer Pro models) support data transfer speeds of 10 Gbit/s - pretty impressive as far as data transfer speeds go. However, the USB-C cable that comes included in the box only transfers data at 480Mbps. The minimum speed requirement to shoot to an external drive is 4.8 Gb/s (also known as USB 3.0 speeds).
The worst part about it is that the iPhone won’t warn you if your cable is too slow, which means you can get into situations where you sit down and shoot an hour of A-Roll, only to realise after only 2% of that video was captured (I’ve been there!). So you don’t want to get this bit wrong.
FAQs
How do I disconnect an external drive from my phone? Do I need to eject it like I do on my Mac?
- Unlike desktops, iPadOS and iOS don’t require a “safe” ejection of a storage device, meaning you can just unplug the drive and everything should be fine. Just make sure no files are being transferred when disconnecting - I usually close the files app and any camera apps I have opened just to be safe.
Can I connect an external drive to a base model iPhone (e.g. an iPhone 16)?
- I mean technically, yes you can, since it has a USB-C port. But the transfer speeds are going to be extremely slow - 480Mbps to be precise, which is 20x slower than what the Pro iPhones offer. That said, it’s still worth having an SSD to store old videos to save on your laptop’s storage,
Can I use a Thunderbolt cable with the iPhone?
- Technically, yes, but there’s no advantage (yet). Thunderbolt cables transfer data at 40Gb/s, which is more than what the Pro iPhones currently support. However, there’s nothing stopping future iPhone models from supporting it, so you could buy a Thunderbolt cable to future-proof yourself. Plus, chances are your laptop will support Thunderbolt, so having a Thunderbolt cable will make editing off your SSD a lot faster and more enjoyable of a process. Finally, Thunderbolt cables aren’t ridiculously expensive - the one I use from Anker only cost me £21.99!
What does it mean to ‘format’ a drive? How do I format an external drive?
- External drives have different ‘formats’ - the most common ones are ExFAT (good if you switch between Windows and MacOS) and APFS (optimised for MacOS - it’s the format I use)
- With iOS 18, you can actually format external drives directly in the Files app now! Simply head into Files, press and hold onto your drive name, select “Erase”, and you should have the option to rename your drive and choose the format. Press “Erase” once you’re done
- Just remember than formatting an external drive will erase everything on that drive, including all the footage you have stored on it. So either format your drive when it’s brand new, or if you’ve already got videos on there, move them to another location before formatting.
How much storage should I get on my SSD?
- As much as you can afford. 2TB seems to be the sweet spot between size and affordability
- For context, a typical YouTube video for me consists of 30 minutes of A-Roll and another 30 minutes of B-Roll - shooting everything in ProRes, this is about 360GB per video! So having a 2TB SSD means I could work on 5-6 videos at once without worrying about filling up my SSD
- Right now, I have own two 1TB SSDs and one 2TB SSD. I bought the 1TB drives thinking I was being clever saving money, but in the end I ended up spending the extra money anyway, which is why I say just get what you can afford - you’ll need to upgrade one day regardless
Should I shoot my videos in ProRes?
- There are 2 pros to shooting in ProRes:
- You preserve maximum video quality. Useful if you're creating a paid commercial that's going to be blown up on a cinema screen. Probably not so useful if you're posting a video to YouTube that's going to be watched on somebody's phone
- It's a lot faster to edit with. Because ProRes is less 'compressed' than other video formats, you'll find editing footage is a lot quicker. I definitely do notice the difference in editing speeds, but it's not enough to make me switch to ProRes just yet.
- But there's one major con:
- It takes up a lot of storage (about 6GB per minute)!
- For context, my average tech video consists of about 30-minutes of A-roll and another 30-minutes of B-Roll. That's 360GB of storage taken up by raw footage. Yes, my 2TB SSD can hold that footage, but I can only store about 5-6 videos before I run out
- My long-term goal is to save up for a Western Digital 18TB Hard Drive for storing old videos. That way I can shoot in ProRes without having to worry about storage. But admittedly these drives can be pretty expensive, so it's not something I've invested in yet.